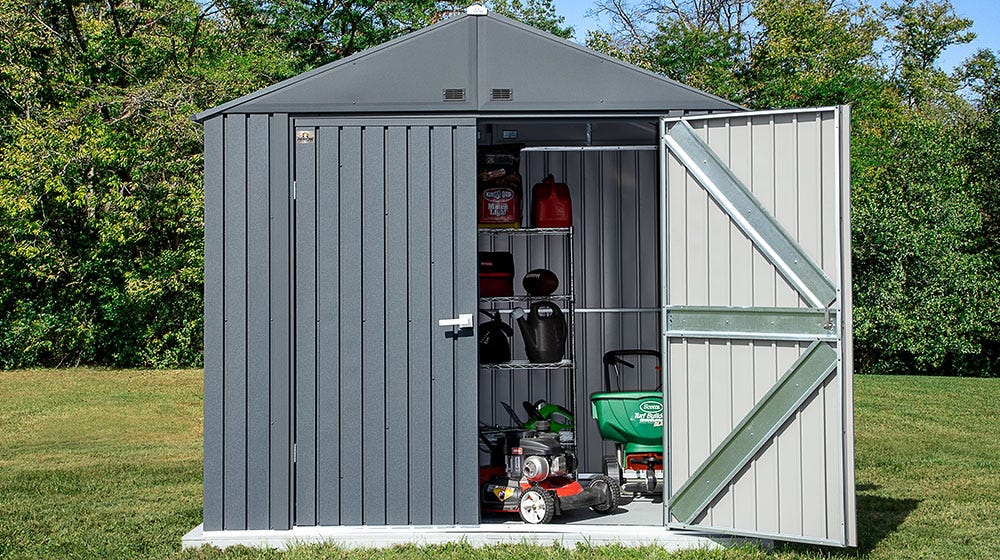
Whether your need convenient, on-site storage or you want to create a man cave, there are many practical reasons to add a metal shed to your property. But, before you can enjoy all the benefits, you need to build your new shed.
Luckily, metal shed installation is quite simple. In fact, you don’t need any DIY know-how or fancy tools to complete your shed installation. While each type of metal shed will have its own specific installation instructions, the general process is the same. Follow these steps and you’ll have your new shed up and ready to enjoy in no time!
Step 1: Prepare for Shed Installation
The first step to shed installation should be checking to make sure you have all the permits you need. Check with your homeowner’s association and your local municipality to make sure you’ve got all your ducks in a row.
Next, make sure you have a space large enough to accommodate your structure. There should be at least a couple of feet of room on each side, so you’re able to easily reach all areas to do maintenance as needed in the future. Also, make sure there aren’t any low-hanging branches or utility lines in the way and that you won’t run into trees, shrubs, or other landscaping.
To make sure you’re fully prepared, read through the manufacturer’s installation instructions. Then, layout all the parts in order. This will help you ensure nothing is missing before you start the shed installation process. Also, gather all the tools you need. You’ll want to make sure you have a power drill or driver, a tape measure, and a nail gun. If you need to level the ground, you’ll also need wooden stakes, string, a string level, a garden rake, and a tamper or plate compactor.
Your shed installation will go much smoother if you choose a clear, calm day. Check the weather and make sure you’ll have at least a few hours with no rain showers or gusty winds. It’s also best if you have at least one other person on hand to help. For everyone’s safety, make sure everyone working on your shed installation has protective glasses and thick gloves.
Step 2: Level the Ground
Before you begin assembling your metal shed, make sure the ground is square and level. If not, you’ll need to take some steps to prepare the land first. Start by staking off the area with wooden stakes and attaching string between them. Attach a string level and use it to determine the high point. This will typically be your starting point, and you’ll build the rest of the ground up to this level.
Leveling the area will be easier if you remove the grass first, using a shovel. Next, add topsoil and use a garden rake to spread it evenly. Use your level and measuring tape to determine the areas where you need to add more soil. Check frequently along the way to ensure the ground stays level. When you’re done, use a plate compactor or a tamper to compact the soil.
It’s best to let the soil settle for at least 48 hours. If you don’t get rainfall during that time, mist the area with water. Once at least two days have passed, double-check to make sure the area is still level before moving on to the next step.
Step 3: Build the Foundation
When you order your shed, you’ll need to decide whether you’ll use a shed base kit, a floor frame kit, a concrete slab, or a wood base. You can also put your shed directly on the ground, if you prefer. However, this isn’t recommended. Your shed will be more level if it’s built on a foundation and both your shed and the items inside will be better protected if it’s up off the ground.
Some sheds, like the Arrow Metal Shed, are available with a base kit. This elevates your shed and is the perfect foundation for a plywood floor finish. If you’re using a kit, follow the procedure below. Otherwise, you’ll need to pour your concrete slab or build your wood base before moving on.
Using a Base Kit
To build your base kit, begin by putting together the four corners of your shed’s floor frame. Make sure you use two screws on each corner. When you’re done, measure the floor frame diagonally. If the measurements are equal, the floor frame is square. If not, you’ll need to make adjustments until it is.
Next, layout your floor rails, following the instructions provided by the manufacturer of your metal shed. While putting the base together, make sure to orient the door rail so it’s facing the direction you prefer.
If you choose to build your wood base, rather than using the kit, the process will be similar. The primary difference is that you’ll have to measure out all the components yourself.
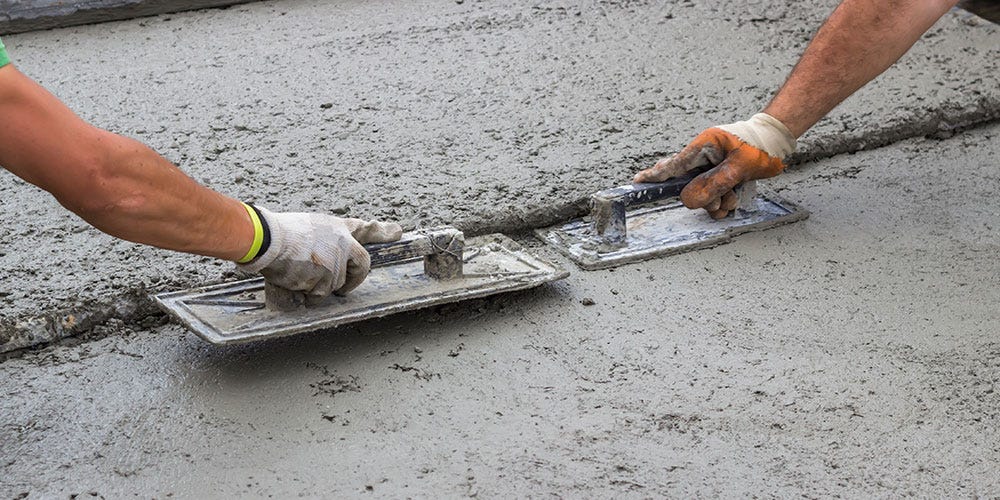
Pouring a Concrete Slab
If you’re going to pour a concrete base instead, you’ll want to start out by marking the area where your foundation will go, using a tape measure and some spray paint. Next, remove the top layer of ground, digging deep enough so you’ll have room for a few inches of gravel and a four-inch-thick slab. Generally, you want the top of the foundation to sit about one inch above the ground when it’s done.
You can purchase a kit to make your concrete form, or build your own with 12-foot boards. Check to make sure everything is level and square, then add gravel, ensuring it’s uniform and will still allow for a minimum four-inch concrete depth. Add some reinforcing bar (rebar), mist the gravel, then mix and pour your concrete. Level the surface with screed board, then finish and edge your concrete. Once the concrete is completely cured, remove the wooden form and your slab is ready to go!
Step 4: Build Corners and Walls
Once you’ve got your shed’s foundation completed, you’ll need to position a corner panel at one corner of your floor frame. Make sure the widest part of each corner panel is placed along the side of the building. Repeat this for all four corners.
When you’re done, fasten the wall panels at both the top and bottom of the shed with your screws. Then, fasten the center of each panel to the wall channel.
Step 5: Build Your Structure
The door jams of your metal shed reinforce the building’s door opening and also create an attractive trim. Build your door jams then use screws to fasten the front wall channels between the end of the side wall channels and the corner channels.
Step 6: Build your Roof
Next, add your gables. They go on top of the front and rear walls, providing support for the roof beams. Attach your four roof beams to the gables, then lift and fasten one gable on the left and right of the structure. Use the gable brace to join the left and right gable together, then fasten the roof beam to the gable brace of the front gable.
When it’s time to build your roof panels, plan to use a step ladder. Start at the back right corner of your shed and begin installing the roof panels. Periodically measure your roof diagonally to make sure it stays square. Lay down your roof panel and build the first ridge cap on your section of the completed roof. Repeat the process until you’ve installed the entire roof. Lastly, complete the installation by attaching the side roof trim.
Step 7: Build Your Doors
Follow the manufacturer’s instructions for assembling your doors. Once they’re installed, attached the door handles and braces. Then, move inside the shed. Place the bottom edge of the right-side door in the floor frame track. Tilt the door up and align the top door brace with the door slide. Then, screw the door to the door slide. That’s it! Your shed is now installed!
Step 8: Anchor Your Shed
After you’ve installed your shed, you must anchor it down. Many sheds will come standard with their own anchor kit. This is critical for ensuring the safety and stability of your metal shed. Remember, if you poured a concrete foundation, you'll need a special set of concrete anchors. Whichever option you choose, simply follow the manufacturer's instructions to ensure proper anchoring.
Shop for Easy-to-Build Metal Sheds Today!
Whether you're still looking for the perfect metal shed or you need some accessories to go with it, you're in the right place. We carry a wide variety sheds, garages, and other on-site storage structures as well as base kits, floor kits, and other helpful items.
Please take a look through our site and don’t hesitate to contact us with any questions. Our knowledgeable sales team will help you choose the best option for your needs and walk you through the set-up process.